Journal 4/28/2006
Hmmm, looks like I have some journaling to catch up on! Let's see, my last journal dealt with the animatic. Since then, I have had to do my shot reel and a rough cut.
The filming, actually, has been the hardest part of this process. I did not have access to good lighting, which was unfortunate, and my takes definitely suffered for it. I ended up filming twice, after seeing how bad the footage was the first time around.
There were a couple things I wish I had known before I started filming. First, one should stripe the tape before attempting to film a whole bunch of takes so that the time code doesn't keep resetting. I tried to log my clips in Final Cut, and it was absolutely impossible because my timecode kept resetting every few minutes or so. The skills of my cameramen were also apparent--how shall I say, less than stellar. Unfortunately, in both cases, I had to rewind the tape to check the footage nearly every shot, which probably led to the timecode resetting. The footage was also pretty jerky.
The second thing I wish I had known before filming was that we should judge the brightness and color of our clips on the NTSC screens rather than the computer monitors. In retrospect, I think that some of the footage that I thought was too dark might have been okay on the NTSC monitors. I had the idea, halfway through the filming, to film in very low light to simulate night time, as if the writer was working through the night and finishing at dawn. I used, of all things, a wide-screen tv and my laptop's monitor to provide some low light. Unfortunately, the footage turned out quite grainy.
A third thing, which is more of a wish, is that my laptop has no firewire connection, so I couldn't see the footage without rewinding the tape. It would have made things so much faster. Essentially, I spent two entire days trying to do the filming for this project, and another day or so trying to adjust the brightness and contrast in post.
On the upside, I now have valuable lessons in filming with the dv camera. I'm still a little hazy on how to do shots simulating night time, I guess the idea is to keep the lights high and tight, with low ambient light, and then colorize everything in post. Also, serendipitously, I've managed to use the grain on most of the scenes to my advantage in the effects work.
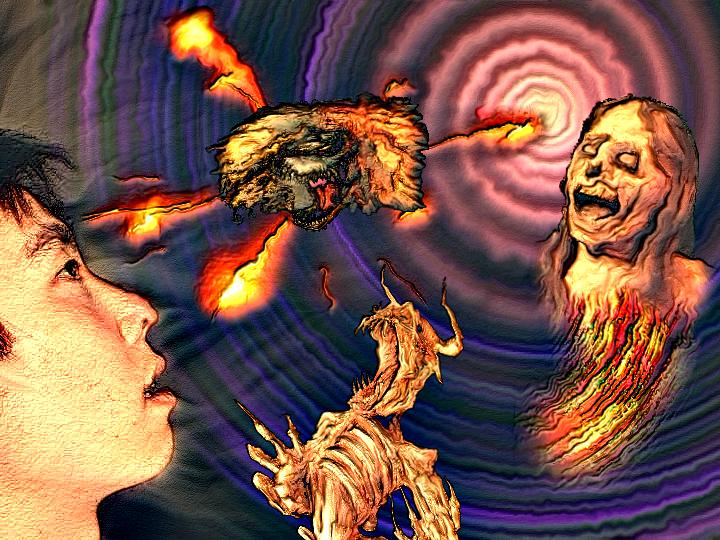
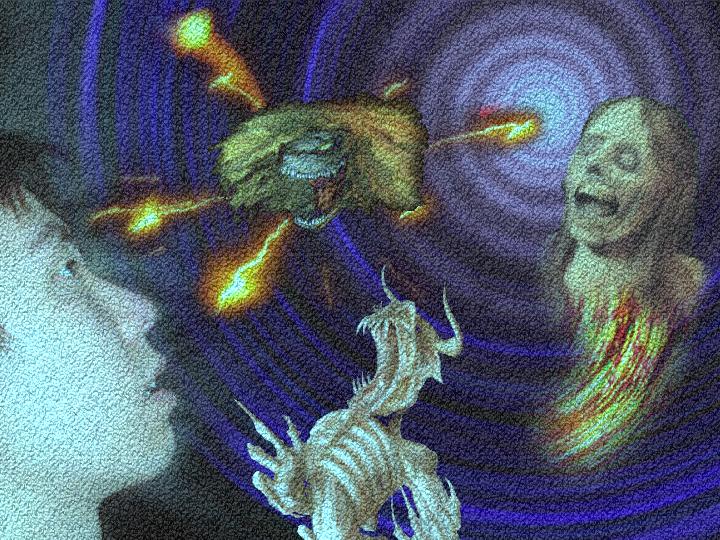
Which brings me to the roughcut. Much more fun than the filming. The first thing I did was take my monster images and animate them with photoshop. Essentially, I had them all open their mouths. I ended up using GIMP to do the final touch ups because GIMP's blur and smudge tools are a lot better than photoshop's, in my opinion. The result was relatively realistic--I asked around and most people could not tell which was the original image and which were photoshopped.
Secondly, I knew all the monsters would need to have their background's keyed out, so I colored their backgrounds bright solids: purple, orange-red, and neon green. The keying was quite easy to do in After Effects. A little bit more difficult was the "animations" themselves. I lay the three "frames" of animation on top of each other and keyed their opacity properties until I got a relatively smooth animation. The difficulty was in getting one frame to appear and getting one to disappear while making sure the monster itself didn't look like it was becoming transparent.
The After Effects class was quite useful for figuring out how to create nice filters for my shots. I settled for a color burn filter to get a nightmarish, grainy look for the first effects scene, which actually looks great even with the accentuated graininess. For the second effects shot, I used photo filter and tint. Additionally, I doubled up the footage for that scene, putting filters on one layer and leaving them out on the bottom layer. By changing their opacities and modes, I got the footage to look mostly greenish (a tribute to American remake of The Ring), but with slightly orange highlights. It created a weird, trippy look, and greatly covered up the fact that the footage was terrible. It almost looks like I meant to have all that grain.
Finally, for the first rough cut, I put an animated mask on the green footage. This was a major detail in my original idea, and can be seen to an extent in my original styleframe. The mask turned out great because the edges have the same orange highlights that the lighter areas of the footage do.
I think the film is turning out pretty well, for my first foray into digital animation production. Tasks still left to do: animate crosses, check marks, and scribbles. Animate monsters attacking in the second scene. Create a text effect for the zooming in on the screen. Replace the opening scene with an After Effects text animation. Stabilize the footage. Track reddish eyes to my face at the last scene. Do the animation for the last scene.
posted by JKing @ 12:59 PM
0 comments
![]()